Category: Technology

  • How to Create a Responsive Website Using Bootstrap

    How to Create a Responsive Website Using Bootstrap

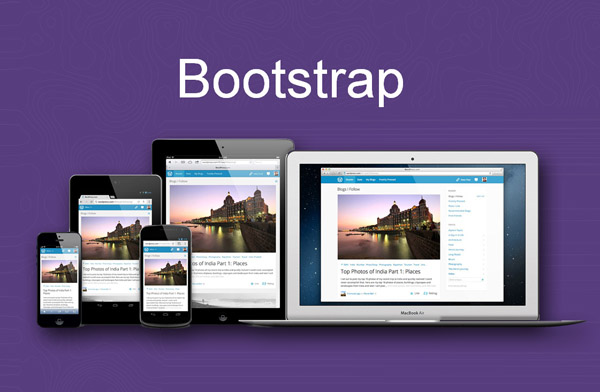
    In today’s digital world, creating a responsive website is essential for ensuring that your site looks great and functions well across all devices, from desktop computers to smartphones and tablets. One of the most efficient ways to build a responsive website is by using Bootstrap, a powerful front-end framework that simplifies the design and development process. If you’re looking for a way to create a responsive website using Bootstrap, this guide will walk you through the essentials and provide you with the knowledge you need to build a professional, mobile-friendly website.

    Whether you’re a beginner or a seasoned developer, this tutorial will help you understand how to use Bootstrap’s grid system, components, and utilities to create a website that adapts to different screen sizes.

    What is Bootstrap?

    Bootstrap is an open-source front-end framework developed by Twitter. It provides a set of CSS, JavaScript, and HTML components that help developers quickly design and customize websites. It is widely used for creating responsive web pages because it offers a mobile-first approach, ensuring that websites look good on both mobile devices and desktops.

    Some key features of Bootstrap include:

    • A grid system that helps create flexible layouts.

    • Pre-built components like navigation bars, buttons, and forms.

    • JavaScript plugins for adding interactive elements like modals and carousels.

    • Customizable themes and styles.

    Now that we understand what Bootstrap is, let’s dive into how to create a responsive website using Bootstrap.

    How to Create a Responsive Website Using Bootstrap: Step 1 – Set Up Your Project

    Before you start writing code, you need to set up your project folder. Follow these steps to create a basic structure:

    1. Create a Project Folder: Start by creating a new folder on your computer. This folder will hold all your project files.

    2. Download Bootstrap: You can either download Bootstrap locally or use a Content Delivery Network (CDN) to link to the latest version. For simplicity, we’ll use the CDN method. Add the following code in the <head> section of your HTML file to include Bootstrap CSS:

      html
      <link href="https://cdn.jsdelivr.net/npm/[email protected]/dist/css/bootstrap.min.css" rel="stylesheet">

      Then, include the Bootstrap JavaScript libraries before the closing </body> tag:

      html
      <script src="https://cdn.jsdelivr.net/npm/[email protected]/dist/js/bootstrap.bundle.min.js"></script>
    3. Create the Basic HTML Structure: Create a new HTML file (e.g., index.html) inside your project folder. The basic structure of the file will look like this:

      html
      <!DOCTYPE html>
      <html lang="en">
      <head>
      <meta charset="UTF-8">
      <meta name="viewport" content="width=device-width, initial-scale=1.0">
      <title>Responsive Website Using Bootstrap</title>
      <link href="https://cdn.jsdelivr.net/npm/[email protected]/dist/css/bootstrap.min.css" rel="stylesheet">
      </head>
      <body>
      <!-- Content will go here -->
      <script src="https://cdn.jsdelivr.net/npm/[email protected]/dist/js/bootstrap.bundle.min.js"></script>
      </body>
      </html>

    The meta viewport tag ensures that your site is responsive on all devices. Now, you’re ready to start building your responsive website.

    How to Create a Responsive Website Using Bootstrap: Step 2 – Using the Grid System

    One of the most powerful tools in Bootstrap is its grid system, which allows you to create flexible, responsive layouts. The grid system is based on 12 columns, and you can specify how many columns each element should span.

    1. Create a Container: To get started, you need to wrap your content in a container. A container ensures that your content is properly aligned. Use the following code to create a container:

      html
      <div class="container">
      <!-- Your content will go here -->
      </div>
    2. Create Rows and Columns: Inside the container, you’ll create rows and columns. Rows are used to hold columns, and columns will contain your actual content. Here’s an example:

      html
      <div class="container">
      <div class="row">
      <div class="col-md-4">
      <div class="bg-light p-3">Column 1</div>
      </div>
      <div class="col-md-4">
      <div class="bg-light p-3">Column 2</div>
      </div>
      <div class="col-md-4">
      <div class="bg-light p-3">Column 3</div>
      </div>
      </div>
      </div>

      In this example:

      • The container class wraps the content.

      • The row class is used to create a horizontal row of columns.

      • The col-md-4 class means each column will take up 4 out of the 12 columns on medium-sized screens (≥768px).

      You can adjust the column sizes based on the device. For example, col-sm-6 will span 6 columns on small screens, and col-lg-3 will span 3 columns on large screens.

    3. Responsive Layouts: The key to making your website responsive is to adjust the column widths based on different screen sizes. Bootstrap uses responsive classes that change the number of columns depending on the screen width. For example:

      html
      <div class="container">
      <div class="row">
      <div class="col-12 col-md-6 col-lg-4">
      Column 1
      </div>
      <div class="col-12 col-md-6 col-lg-4">
      Column 2
      </div>
      <div class="col-12 col-md-6 col-lg-4">
      Column 3
      </div>
      </div>
      </div>

      In this example:

      • On extra small screens (col-12), each column will take up the full width.

      • On medium screens (col-md-6), each column will take up half the width.

      • On large screens (col-lg-4), each column will take up one-third of the width.

    This flexibility allows you to create a layout that adapts to all screen sizes, from mobile phones to large desktop monitors.

    How to Create a Responsive Website Using Bootstrap: Step 3 – Adding Components

    Bootstrap comes with a variety of pre-built components that can be easily integrated into your website. These include navigation bars, buttons, cards, modals, and more. Let’s look at how to add some of these components.

    1. Navigation Bar: A responsive navigation bar that adapts to different screen sizes is easy to create with Bootstrap. Here’s a simple example:

      html
      <nav class="navbar navbar-expand-lg navbar-light bg-light">
      <a class="navbar-brand" href="#">My Website</a>
      <button class="navbar-toggler" type="button" data-bs-toggle="collapse" data-bs-target="#navbarNav" aria-controls="navbarNav" aria-expanded="false" aria-label="Toggle navigation">
      <span class="navbar-toggler-icon"></span>
      </button>
      <div class="collapse navbar-collapse" id="navbarNav">
      <ul class="navbar-nav">
      <li class="nav-item active">
      <a class="nav-link" href="#">Home</a>
      </li>
      <li class="nav-item">
      <a class="nav-link" href="#">About</a>
      </li>
      <li class="nav-item">
      <a class="nav-link" href="#">Services</a>
      </li>
      <li class="nav-item">
      <a class="nav-link" href="#">Contact</a>
      </li>
      </ul>
      </div>
      </nav>

      This navigation bar will collapse into a hamburger menu on smaller screens, making it mobile-friendly.

    2. Cards: Bootstrap cards are flexible and can be used to display content in a grid layout. Here’s an example of a card component:

      html
      <div class="card" style="width: 18rem;">
      <img src="https://via.placeholder.com/150" class="card-img-top" alt="...">
      <div class="card-body">
      <h5 class="card-title">Card Title</h5>
      <p class="card-text">Some quick example text to build on the card title and make up the bulk of the card's content.</p>
      <a href="#" class="btn btn-primary">Go somewhere</a>
      </div>
      </div>

    How to Create a Responsive Website Using Bootstrap: Step 4 – Customize and Style Your Website

    Once you’ve laid out the basic structure using Bootstrap’s grid system and components, you can further customize the design with your own styles. You can override Bootstrap’s default styles by adding your own CSS in a <style> block or in an external CSS file.

    For example, to change the background color of the navigation bar, you can add the following CSS:

    css
    .navbar {
    background-color: #4CAF50;
    }

    This simple addition will customize the navbar to have a green background.

    Conclusion

    Learning how to create a responsive website using Bootstrap is a valuable skill for web developers. With its easy-to-use grid system and pre-built components, Bootstrap makes building responsive websites faster and more efficient. By following the steps in this guide, you can create a website that looks great on any device, whether it’s a smartphone, tablet, or desktop.
  • How to Build a PC at Home

    How to Build a PC at Home

    Building your own PC can be a rewarding experience, allowing you to customize your system to meet your specific needs while also saving money compared to pre-built options. Whether you’re a gamer, content creator, or simply someone who wants a powerful workstation, understanding how to build a PC at home is essential. In this guide, we’ll walk you through the entire process, from choosing components to assembling and setting up your new computer.

    Why Build a PC at Home?

    Before we dive into how to build a PC at home, let’s explore why you might want to do it:

    • Customization: Choose exactly what components you want.
    • Better Performance: Get more power for your money compared to pre-built systems.
    • Upgradeability: Easily upgrade parts in the future.
    • Learning Experience: Gain valuable knowledge about computer hardware.

    Now, let’s go through the process step by step.

    Step 1: Choosing the Right Components

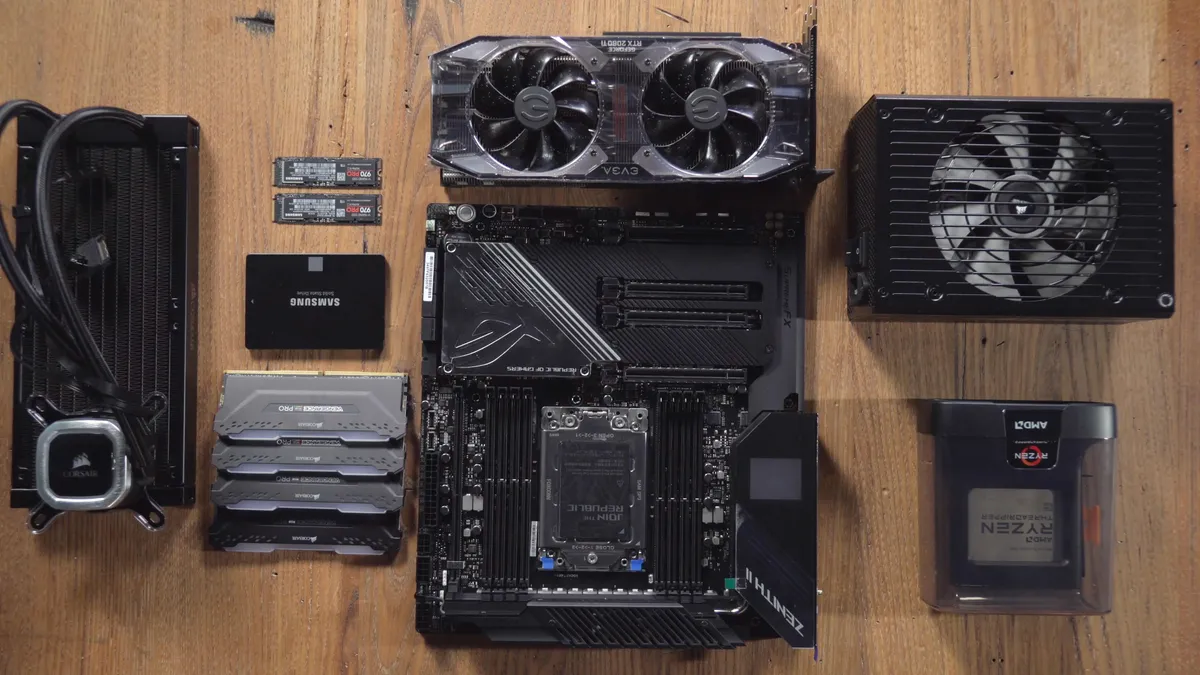
    Before assembling your PC, you need to gather all the necessary components. Here’s what you’ll need:

    1. Processor (CPU)

    The CPU is the brain of your computer. Choose between Intel (Core i5, i7, i9) or AMD (Ryzen 5, 7, 9) based on your needs.

    2. Motherboard

    Make sure your motherboard is compatible with your chosen CPU. Consider features like WiFi support, number of RAM slots, and PCIe slots.

    3. Memory (RAM)

    For general use, 16GB is recommended. For gaming or heavy multitasking, opt for 32GB or more.

    4. Storage (SSD/HDD)

    • SSD (Solid State Drive): Faster boot and load times.
    • HDD (Hard Disk Drive): More storage at a lower cost.
    • NVMe SSD: Even faster than SATA SSDs for performance users.

    5. Graphics Card (GPU)

    If you’re gaming or doing video editing, a dedicated GPU (NVIDIA RTX 30/40 series or AMD Radeon RX series) is essential.

    6. Power Supply Unit (PSU)

    Ensure you get a reliable PSU with 80 Plus Bronze, Gold, or Platinum certification. Choose the wattage based on your components.

    7. Case

    Select a case that fits your motherboard size (ATX, Micro-ATX, Mini-ITX) and has good airflow.

    8. Cooling System

    • Stock CPU coolers are fine for basic setups.
    • Aftermarket air or liquid coolers are better for overclocking or high-performance builds.

    9. Operating System (OS)

    Windows, Linux, or any OS of your choice. Windows 10/11 is the most common for gaming and general use.

    Step 2: Assembling Your PC

    Now that you have all the components, let’s get into the fun part: building the PC.

    1. Prepare Your Workspace

    • Work on a clean, static-free surface.
    • Use an anti-static wrist strap or touch a grounded metal object to discharge static electricity.

    2. Install the CPU

    • Open the CPU socket latch on the motherboard.
    • Align the CPU correctly and place it into the socket.
    • Secure the CPU by closing the latch.

    3. Install the RAM

    • Locate the RAM slots on the motherboard.
    • Insert RAM sticks into the slots and press down until they click.

    4. Install the Storage (SSD/HDD)

    • For NVMe SSD: Insert into the M.2 slot and secure it with a screw.
    • For SATA SSD/HDD: Mount it in the drive bay and connect power + data cables.

    5. Install the Motherboard into the Case

    • Place the motherboard inside the case and align it with the standoff screws.
    • Secure it with screws.

    6. Install the Power Supply (PSU)

    • Mount the PSU in the case (bottom or top position, depending on the case design).
    • Connect the required power cables to the motherboard, CPU, and GPU.

    7. Install the Graphics Card (GPU)

    • Insert the GPU into the PCIe slot on the motherboard.
    • Secure it with screws and connect the power cables from the PSU.

    8. Connect Case Fans and Cooling System

    • Connect all case fans to the motherboard.
    • If using an aftermarket cooler, follow the manufacturer’s instructions.

    9. Connect Front Panel Cables

    • Plug in the power button, reset button, USB ports, and audio connectors from the case to the motherboard.

    Step 3: Power On and Install the Operating System

    1. Boot Up the System

    • Connect the monitor, keyboard, and mouse.
    • Power on the PC. If everything is connected correctly, you should see the BIOS screen.

    2. Enter BIOS Settings

    • Press DEL or F2 to enter the BIOS.
    • Check if all components are detected.
    • Set the boot priority to USB if installing an OS.

    3. Install Windows/Linux

    • Insert a USB drive with the OS installer.
    • Follow the on-screen instructions to install the OS.

    4. Install Drivers and Updates

    • Download and install motherboard drivers, GPU drivers, and Windows updates.

    Step 4: Optimize and Personalize Your PC

    1. Update Windows and Install Software

    • Install essential programs like browsers, security software, and utilities.

    2. Optimize Storage

    • Set up partitions if needed.
    • Enable TRIM for SSD performance.

    3. Adjust Power Settings

    • For high performance, change power settings in Windows to High Performance mode.

    Common Mistakes to Avoid When Building a PC at Home

    • Not checking compatibility: Ensure all components are compatible before buying.
    • Forgetting thermal paste: If installing a third-party cooler, apply thermal paste.
    • Skipping cable management: Neatly organize cables to improve airflow and aesthetics.
    • Not securing components properly: Loose components can cause issues.

    Conclusion

    Now that you’ve learned how to build a PC at home, you can enjoy a fully customized, high-performance system tailored to your needs. By carefully selecting your components, following proper installation steps, and optimizing your setup, you can build a powerful PC that lasts for years.

    Whether you’re a first-time builder or an experienced enthusiast, building a PC is a rewarding experience that gives you full control over your hardware. If you ever run into issues, there are plenty of online resources and communities to help troubleshoot. So, get started and enjoy the satisfaction of using a PC that you built yourself!

  • How to Connect Wireless Joystick to Laptop

    How to Connect Wireless Joystick to Laptop

    Gaming has evolved dramatically over the years, with laptops now being one of the preferred platforms for both casual and hardcore gamers. One of the key elements of an enjoyable gaming experience is having the right controller, and many gamers prefer to use a joystick for enhanced control and comfort. But for those wondering, how to connect wireless joystick to laptop, the process can seem a bit tricky.

    Luckily, connecting a wireless joystick to a laptop is a fairly straightforward process, as long as you know what steps to follow. Whether you’re using a wireless USB dongle, Bluetooth, or a gamepad designed for PC gaming, this guide will walk you through everything you need to do.

    Why Use a Wireless Joystick with Your Laptop?

    Before diving into the “how-to,” let’s quickly explore why you might want to connect a wireless joystick to your laptop in the first place.

    1. Enhanced Gameplay: Many games, especially those that involve a lot of action or require precise control (like racing games or action-adventure titles), are better suited for a joystick or gamepad.
    2. Freedom of Movement: A wireless joystick offers the flexibility to play from a distance without worrying about tangled cords or being confined to a specific spot near your laptop.
    3. Comfort and Ergonomics: Joysticks are often more comfortable for extended gaming sessions compared to using a mouse and keyboard, reducing hand strain.

    Now that we know why you might want to connect a wireless joystick to your laptop, let’s go over the process of doing so.

    Step-by-Step Guide on How to Connect Wireless Joystick to Laptop

    There are multiple ways to connect a wireless joystick to your laptop, depending on the type of joystick and the connection method it supports. Below, we’ll cover the main methods to help you get started.

    Method 1: Connecting via Bluetooth

    Many modern wireless joysticks come with Bluetooth capabilities, which makes connecting them to a laptop quick and easy. Here’s how you can connect your Bluetooth joystick to your laptop:

    Step 1: Ensure Your Laptop Has Bluetooth

    Before proceeding, make sure that your laptop supports Bluetooth. Most modern laptops do, but if yours doesn’t, you can purchase a Bluetooth USB dongle and plug it into your laptop’s USB port to enable Bluetooth functionality.

    Step 2: Turn On Bluetooth on Your Laptop
    1. Click on the Start Menu and open Settings (the gear icon).
    2. Navigate to Devices and select the Bluetooth & other devices section.
    3. Make sure that Bluetooth is turned on. If it’s off, toggle the switch to turn it on.
    Step 3: Put Your Joystick in Pairing Mode

    Each wireless joystick has a different method for entering pairing mode, but typically, you need to hold down the power button for a few seconds until the LED light on the joystick starts blinking. This indicates that it’s in pairing mode.

    Refer to your joystick’s manual if you’re unsure how to activate pairing mode.

    Step 4: Pair the Joystick with Your Laptop
    1. In the Bluetooth settings on your laptop, click on Add Bluetooth or other device.
    2. Select Bluetooth from the options that appear.
    3. Your laptop will begin searching for nearby Bluetooth devices. Once your joystick appears in the list, click on it to pair it.
    4. Wait for the connection to be established. You may be prompted to confirm the connection on both the joystick and the laptop.

    Once paired, your joystick should be ready to use!

    Step 5: Test the Joystick

    Open a game or use a controller-testing application to check if your joystick is functioning properly. If it works, you’re good to go! If not, try restarting your laptop or re-pairing the joystick.

    Method 2: Connecting via USB Receiver

    Some wireless joysticks use a USB wireless receiver (often called a dongle) to connect to your laptop. Here’s how to connect a wireless joystick to your laptop using a USB receiver:

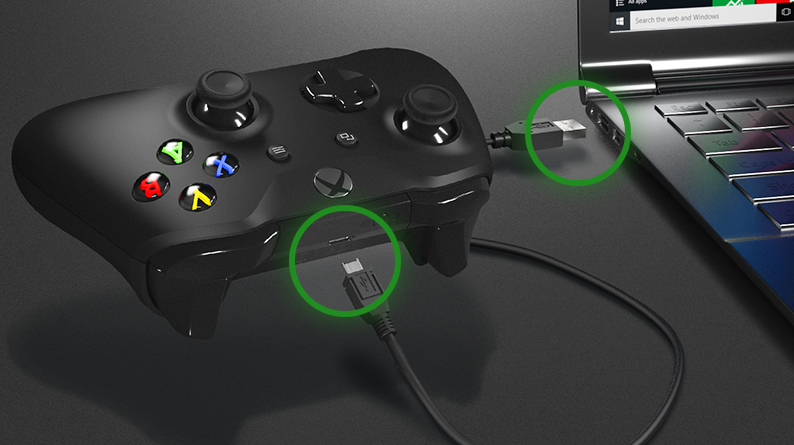
    Step 1: Plug in the USB Receiver
    1. Locate the small USB dongle that came with your joystick. It’s usually a tiny device that plugs into one of your laptop’s USB ports.
    2. Insert the USB dongle into an available USB port on your laptop.
    Step 2: Turn on the Joystick

    Power on your joystick by pressing the designated power button. The joystick should automatically detect the USB receiver and establish a wireless connection.

    Step 3: Wait for Automatic Installation

    In most cases, once you plug in the USB dongle, your laptop should automatically detect the joystick and install any necessary drivers. This process usually takes a few seconds.

    Step 4: Test the Joystick

    Open a game or use a controller-testing app to verify that your joystick is working properly. If it’s not, you may need to reinstall the joystick’s drivers or refer to the user manual for troubleshooting steps.

    Method 3: Using Software to Configure the Joystick

    If your joystick comes with specific software (such as Logitech’s SetPoint or Gaming Software), you may need to install it to customize your joystick’s controls or configure specific settings. Follow these steps to install the software:

    Step 1: Download and Install the Software
    1. Go to the joystick manufacturer’s website and locate the driver or software downloads section.
    2. Download and install the relevant software for your joystick.
    Step 2: Launch the Software

    Once installed, launch the joystick configuration software. This software often lets you set up custom buttons, assign macros, and optimize performance based on your gaming preferences.

    Step 3: Configure the Joystick

    You can now customize the joystick’s settings based on your needs, whether that’s remapping buttons or adjusting the sensitivity. Many gaming peripherals also let you set up profiles for different games, so you can switch between configurations quickly.

    Step 4: Test Your Customizations

    Once your joystick is configured, launch a game and check if the customizations work as expected. This will help you fine-tune your joystick setup for the best gaming experience.

    Troubleshooting Tips for Connecting a Wireless Joystick to Your Laptop

    Sometimes, things don’t go as smoothly as expected when you’re trying to connect a wireless joystick to your laptop. Here are some common issues and troubleshooting tips:

    1. Joystick Not Detected: If your joystick isn’t being detected, ensure that Bluetooth is enabled on your laptop, or that the USB dongle is properly inserted. Restart both your laptop and joystick to resolve connection issues.
    2. Connection Drops: If the connection frequently drops, check the battery level of your joystick and replace it if needed. Interference from other wireless devices can also cause connectivity issues, so try moving closer to your laptop or minimizing interference.
    3. Joystick Not Working in Games: If the joystick works but doesn’t respond within a game, check the game’s controller settings. Some games require you to enable controller support manually in the settings menu.
    4. Software Conflicts: If you’ve installed joystick software and are experiencing issues, try uninstalling and reinstalling the software. Make sure you’re using the correct drivers and that they’re up to date.

    Conclusion

    Now that you know how to connect wireless joystick to laptop, you can enjoy a more immersive and comfortable gaming experience. Whether you use Bluetooth or a USB receiver, setting up a wireless joystick is easy and quick. Just make sure to back up your game settings, test the connection, and customize your joystick’s configuration to suit your gaming style.

  • Download YouTube videos on laptop in these easy ways

    Download YouTube videos on laptop in these easy ways

    YouTube is the second largest website. The number of monthly visitors on YouTube is about 23 billion

    You can also download YouTube videos with the help of some tools. After which you can watch YouTube videos offline or save them.

    How to Download YouTube Videos for Free Without Downloading Software

    If you do not want to download YouTube videos for free and do not want to download any third party software, then here we are sharing some special tips for you. All you have to do is use a web browser for this.

    There are many websites on the Internet where you can paste the URL of a YouTube video and then click on the resolution to download it. One of these websites is Savefrom.net. And videos can be downloaded in bulk from the YouTubePlaylist.cc website.

    However, these websites have their flaws. Sometimes such sites are closed due to being illegal. At the same time, sometimes they redirect to other sites which may be unsafe for you. For this, it is important to have a good antivirus program in your device.

    How to Download YouTube Videos in Bulk

    To download YouTube videos in bulk on PC, you will take the help of 4K Video Downloader. Follow the steps given below…

    • Install 4K Video Downloader on computer.
    • Now open any youtube channel. and copy the link.
    • Paste the copied link in 4K Video Downloader. Here you will see the tab of Download Playlist, click on it.
    • After this, choose the format according to you and download the video.
    • With the help of this software, videos of other platforms like Facebook and Dailymotion can also be downloaded.