Author: William Johnson

  • How to Create a Samsung Account Step-by-Step

    How to Create a Samsung Account Step-by-Step

    A Samsung account is more than just a login; it’s your personal key to unlocking the full potential of your Samsung devices and services. From securing your precious photos in the cloud to locating a lost phone, accessing exclusive apps in the Galaxy Store, and seamlessly connecting smart home devices via SmartThings, a Samsung account centralizes your experience.

    In today’s interconnected digital world, having a dedicated account for your device ecosystem has become a standard. Apple has its Apple ID, Google has its Google Account, and Samsung offers its Samsung account to provide a cohesive and enhanced user experience across its vast range of products, including smartphones, tablets, smart TVs, wearables, and home appliances. This integration ensures that your data is synced, your devices work together harmoniously, and you can leverage unique features designed specifically for Samsung users.

    This detailed guide will walk you through the process of creating a Samsung account step-by-step, whether you’re setting up a new Samsung Galaxy phone or registering online.

    Why You Need a Samsung Account

    Before diving into the “how-to,” let’s quickly understand the significant benefits of having a Samsung account:

    • Find My Mobile (or Samsung Find): Locate, lock, wipe, or ring your lost Samsung Galaxy phone or other connected Samsung devices, even if they are offline. This is a critical security feature.
    • Samsung Cloud: Backup and restore your device data (contacts, call logs, messages, calendar, settings, home screen layout, app data, etc.). While Gallery sync now often integrates with Microsoft OneDrive, other crucial data remains in Samsung Cloud.
    • Galaxy Store: Access and download exclusive apps, themes, fonts, and watch faces specifically optimized for Samsung Galaxy devices.
    • SmartThings: Control and manage your compatible SmartThings smart home devices from anywhere.
    • Samsung Health: Sync and backup your health and fitness data across Samsung devices and wearables.
    • Samsung Pass: Securely store and auto-fill passwords for websites and apps.
    • Samsung Pay/Wallet: Manage your payment cards for convenient mobile payments.
    • Samsung Rewards: Earn points and get benefits for purchases and activities within the Samsung ecosystem.
    • Exclusive Promotions: Access special offers and discounts on Samsung products and services.
    • Galaxy AI features: Many advanced AI features on newer Samsung Galaxy phones (like the Galaxy S24 series) require you to be signed into your Samsung account to function.
    • Device Continuity: Seamlessly switch between Samsung devices, pick up where you left off in apps, and share content easily.

    Method 1: Creating a Samsung Account on Your Samsung Galaxy Phone (Recommended)

    This is the most common and convenient way to create your account, often prompted during initial device setup.

    Step 1: Open Settings

    1. From Initial Setup (New Phone): If you are setting up a brand-new Samsung Galaxy phone, you will typically be prompted to sign in or create a Samsung account during the initial setup wizard. Follow the on-screen prompts.
    2. From Existing Phone: If you bypassed this or want to create an account on an already-set-up phone:
      • Tap the Settings app icon on your home screen or in your app drawer (it looks like a gear).
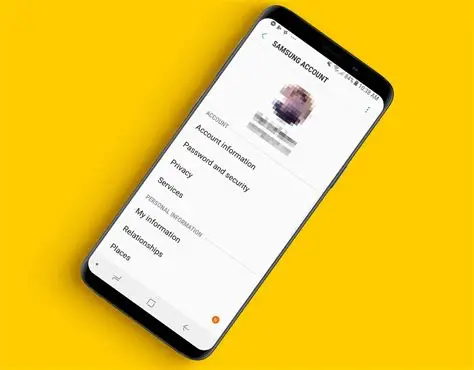
      • At the very top of the Settings menu, you will usually see a section labeled “Samsung account” or “Sign in to your Galaxy”. Tap on this.

    Step 2: Initiate Account Creation

    1. Tap “Create account”: If you’re not already signed in, you’ll see options to sign in, find ID, or “Create account.” Tap “Create account.”
    2. Age Verification: You may be asked to verify your age for safety and legal compliance. Enter your date of birth.

    Step 3: Agree to Terms and Conditions

    1. Review and Agree: Carefully read the “Samsung account Terms and Conditions,” “Samsung account Privacy Notice,” and any other optional terms (like marketing preferences).
    2. Check Boxes: You must agree to the mandatory terms (usually highlighted). You can choose to agree or disagree with the optional terms.
    3. Tap “Agree”: Once you’ve made your selections, tap the “Agree” button to proceed.

    Step 4: Enter Your Details

    1. Email Address: Enter a valid and accessible email address that you own. This will be your Samsung account ID. Ensure it’s an email you regularly check, as it will be used for verification and password recovery.
    2. Password: Create a strong password. It must be at least 8 characters long and typically requires a mix of:
      • Uppercase letters
      • Lowercase letters
      • Numbers
      • Symbols (e.g., !, @, #, $)
    3. Confirm Password: Re-enter your password to confirm it.
    4. First Name and Last Name: Enter your legal first and last names.
    5. Date of Birth: Re-confirm your date of birth if prompted.
    6. Tap “Create account”: Once all required fields are filled, tap the “Create account” button.

    Step 5: Verify Your Account

    This is a crucial security step to ensure you are the legitimate owner of the email address.

    1. Check Email: A verification email will be sent to the email address you provided.
    2. Tap “Go to inbox”: Your phone might offer a button like “Go to inbox” to directly open your email app. If not, manually open your email client.
    3. Find Verification Email: Look for an email from Samsung account (check your spam/junk folder if you don’t see it). The subject line will typically be “Verify your Samsung account” or similar.
    4. Tap Verification Link: Open the email and tap the “Verify account” link or button within the email.
    5. Confirmation: Once you tap the link, your Samsung account will be verified, and you’ll usually see a confirmation message in your web browser or on your phone. Your Samsung Galaxy phone will then automatically sign into the newly created account.

    Method 2: Creating a Samsung Account Online (via Web Browser)

    You can also create a Samsung account directly from a web browser on any computer or mobile device.

    Step 1: Go to the Samsung Account Website

    1. Open Browser: Open your preferred web browser (Chrome, Firefox, Edge, Safari).
    2. Visit Samsung Account Page: Go to the official Samsung account website: https://account.samsung.com/ (or search for “Samsung account create” on Google).

    Step 2: Initiate Account Creation

    1. Click “Create account”: On the Samsung account login page, look for and click the “Create account” button.

    Step 3: Agree to Terms and Conditions

    1. Review and Agree: Read through the mandatory and optional terms and conditions (e.g., “Samsung account Terms and Conditions,” “Privacy Notice”).
    2. Check Boxes: Check the boxes to agree to the mandatory terms.
    3. Click “Agree”: Click the “Agree” button.

    Step 4: Enter Your Details

    1. Email Address: Enter your desired email address (this will be your Samsung account ID).
    2. Password: Create and confirm a strong password (8+ characters, mix of upper/lower case, numbers, and symbols).
    3. First Name, Last Name, Date of Birth: Fill in your personal details as requested.
    4. Click “Next” or “Create account”: Proceed to the next step.

    Step 5: Verify Your Account

    1. Check Email: An email with a verification link will be sent to the email address you provided.
    2. Open Email and Click Link: Access your email inbox, find the verification email from Samsung account, and click the “Verify account” link.
    3. Confirmation: Your account will be verified, and you will be signed in to your Samsung account dashboard on the website.

    Step 6: Sign In on Your Samsung Phone (if created online)

    1. Open Settings: On your Samsung Galaxy phone, go to Settings.
    2. Tap Samsung Account: Tap the “Samsung account” or “Sign in to your Galaxy” section at the top.
    3. Sign In: Enter the email address and password you just created online.
    4. Two-Step Verification (if enabled): If you’ve set up two-step verification (highly recommended), you will receive a code or prompt on your phone/another trusted device to complete the login.

    Enhancing Your Samsung Account Security (Highly Recommended)

    • Two-Step Verification (2SV): This adds an extra layer of security. Even if someone gets your password, they can’t access your account without a second verification step (e.g., a code sent to your phone or generated by an authenticator app).
      1. Go to Settings > Samsung account (your profile at the top).
      2. Tap “Security and privacy” or “Password and security.”
      3. Tap “Two-step verification” and follow the prompts to set it up (via text message, authenticator app, or backup codes).
    • Keep Your Recovery Email/Phone Up-to-Date: Ensure the recovery email address and phone number associated with your Samsung account are current in case you need to reset your password.

    Conclusion

    Creating a Samsung account is a straightforward process, whether done directly on your Samsung Galaxy phone during initial setup or through the official website. This account is fundamental to accessing a wide array of exclusive features and services that enhance your Samsung device experience, from crucial security measures like Find My Mobile to convenient cloud backups and a richer app ecosystem. By following these steps and prioritizing security measures like two-step verification, you can fully integrate your Samsung products and enjoy a seamless, connected digital life.

    FAQ

    Q1: Is a Samsung account mandatory to use a Samsung phone?

    No, a Samsung account is not strictly mandatory to use a basic Samsung phone. You can use the phone for calls, texts, and even download apps from the Google Play Store with just a Google Account. However, you will miss out on many exclusive features and services that are integral to the Samsung ecosystem, such as Find My Mobile, Samsung Cloud, Galaxy Store apps, and advanced Galaxy AI functions.

    Q2: What is the main difference between a Samsung account and a Google Account on a Samsung phone?

    A Google Account (Gmail) is essential for core Android functionalities like accessing the Google Play Store, syncing contacts, using Gmail, Google Maps, and Google Photos. A Samsung account is specific to Samsung’s ecosystem, providing access to Samsung’s proprietary services and hardware-specific features like Find My Mobile, Samsung Cloud, Galaxy Store, SmartThings, and Samsung Pass. Both accounts serve different, complementary purposes on your Samsung Galaxy phone.

    Q3: Can I create multiple Samsung accounts?

    Yes, you can create multiple Samsung accounts if you have different email addresses. However, each account is treated separately, and their data (like cloud backups or registered devices) are not merged. It’s generally recommended to stick to one primary Samsung account for all your personal devices for a more unified and streamlined experience.

    Q4: I forgot my Samsung account password. How can I reset it?

    If you forget your Samsung account password:

    1. Go to the Samsung account sign-in page (either on your phone’s settings or account.samsung.com).
    2. Tap/click on “Forgot password?” or “Find ID / Reset password.”
    3. Enter your Samsung account ID (your email address).
    4. Follow the on-screen instructions, which will typically involve verifying your identity via email or a registered phone number.

    Q5: What is Samsung Cloud, and how much free storage does it offer?

    Samsung Cloud is a service that allows you to back up and restore data from your Samsung devices. It primarily stores data like contacts, call logs, messages, calendar entries, device settings, and home screen layouts. For gallery sync (photos and videos), Samsung Cloud has largely transitioned to integrate with Microsoft OneDrive. The amount of free storage can vary, but typically it offers 5GB of free storage. You can purchase more storage if needed.

    Q6: Do I need a Samsung account to use Galaxy AI features?

    Yes, many of the advanced Galaxy AI features introduced on newer Samsung Galaxy phones (like the Galaxy S24 series) require you to be signed in to your Samsung account to access and utilize them fully. This ensures the features are properly authenticated and can leverage cloud-based AI processing when necessary.

    Q7: Can I delete my Samsung account?

    Yes, you can delete your Samsung account. However, be aware that deleting your account will permanently erase all data associated with it, including Samsung Cloud backups, purchase history from the Galaxy Store, and access to Find My Mobile. It’s crucial to back up any important data before proceeding with account deletion. You can usually initiate this process by logging into your account at account.samsung.com and navigating to your profile settings.

  • How to Activate eSIM in Samsung Z Flip series

    How to Activate eSIM in Samsung Z Flip series

    Activating an eSIM on your Samsung Galaxy Z Flip series phone typically involves downloading your mobile plan’s profile. This usually requires a Wi-Fi or mobile data connection to complete the download. There are generally three methods to activate an eSIM profile, provided by your mobile network carrier.

    Before You Start: Essential Preparations

    • Check eSIM Compatibility: While all Z Flip series phones are generally eSIM compatible, confirm with your network carrier (telecom provider) that they support eSIMs for your specific Samsung Galaxy Z Flip model and in your region. Some carrier-locked phones or devices from certain regions (e.g., China, Hong Kong, Taiwan, Macao) might have restrictions.
    • Obtain eSIM Information from Your Carrier: You will need an eSIM profile from your mobile network carrier. This usually comes in one of three forms:
      • A QR code (most common and easiest).
      • An activation code to be entered manually.
      • A pre-assigned plan that activates automatically.
    • Internet Connection: Ensure your Samsung Galaxy Z Flip is connected to a stable Wi-Fi network or has an active mobile data connection from an existing physical SIM. This is necessary to download the eSIM profile.

    Method 1: Add Using QR Code (Most Common)

    This is the most frequent and straightforward method for eSIM activation. Your carrier will provide you with a QR code, usually in an email or on a physical voucher.

    Step 1: Access SIM Card Manager

    • Action:
      1. Open the Settings” app on your Samsung Galaxy Z Flip phone.
      2. Tap on “Connections.”
      3. Tap on “SIM card manager.”

    Step 2: Add Mobile Plan

    • Action: In the SIM card manager, tap on Add mobile plan” or “Add eSIM.”
    • Your phone will typically start searching for pre-assigned plans. If none are found or you’re using a QR code, you’ll be prompted with options.

    Step 3: Scan the QR Code

    • Action: Tap on “Add using QR code” (or similar wording like “Scan QR code”).
    • Your phone’s camera will open. Position your Samsung Galaxy Z Flip to scan the QR code provided by your network carrier. Ensure the entire QR code is visible within the camera frame.
    • Action: After scanning, your phone will detect the eSIM profile. Tap “Add” or “Confirm” when prompted.

    Step 4: Download and Activate eSIM Profile

    • Action: Your phone will now download and activate the eSIM profile. This process may take a few minutes.
    • Once completed, you’ll receive a notification that the eSIM has been successfully activated. Tap “OK” or “Done.”

    Method 2: Enter Activation Code Manually

    Some carriers might provide a long activation code instead of a QR code.

    Step 1: Access SIM Card Manager & Add Mobile Plan

    • Action: Follow Step 1 and Step 2 from Method 1 (Settings > Connections > SIM card manager > Add mobile plan).

    Step 2: Choose Manual Entry

    • Action: Instead of scanning a QR code, tap on “Enter activation code” or “Add using activation code” (or similar wording).

    Step 3: Enter Activation Code

    • Action: Carefully type in the activation code exactly as provided by your carrier. Pay close attention to uppercase/lowercase letters and any special characters.
    • Action: Tap “Add” or “Connect.”

    Step 4: Download and Activate eSIM Profile

    • Action: Your phone will download and activate the eSIM profile. Wait for the confirmation message indicating successful activation.

    Method 3: Install a Pre-assigned Plan Automatically

    Some network providers support an automatic eSIM activation process, where the plan is already linked to your device’s unique identifier.

    Step 1: Access SIM Card Manager & Add Mobile Plan

    • Action: Follow Step 1 and Step 2 from Method 1 (Settings > Connections > SIM card manager > Add mobile plan).

    Step 2: Automatic Detection

    • Action: Your phone will typically automatically detect if a pre-assigned plan is available. If it finds one, it will prompt you to download and activate it.
    • Action: Confirm the activation when prompted.

    Note: For this method, your carrier might ask for your phone’s EID (eSIM ID). You can find your EID by going to Settings > About phone > Status information > EID.

    Step 5: Manage Your eSIMs in SIM Card Manager

    After activation, you can manage your eSIM profile(s) and physical SIM from the SIM card manager.

    • Action: Go to Settings > Connections > SIM card manager.
    • Here, you can:
      • Toggle SIMs on/off: Temporarily enable or disable your physical SIM or eSIM.
      • Set preferred SIM: Choose which SIM to use for calls, texts, and mobile data by default.
      • Rename SIMs: Give your eSIM (and physical SIM) custom names (e.g., “Work,” “Personal,” “Travel SIM”) for easier identification.
      • Remove an eSIM: If you no longer need an eSIM profile, you can select it and tap “Remove.” Remember that removing an eSIM from your device does not terminate your contract with the network provider. You must contact your carrier to cancel the service.

    Tips for a Smooth eSIM Activation

    • Strong Internet Connection: A stable Wi-Fi connection is best for downloading the eSIM profile.
    • No Other SIMs During Activation (Optional): While not always necessary, some users find it smoother to remove any physical SIM cards before activating an eSIM to avoid potential conflicts, then reinsert them afterward.
    • Restart Your Phone: After activation, a quick restart can help ensure all network settings are properly applied.
    • Contact Your Carrier: If you encounter any issues, your network carrier’s customer support is the primary point of contact as they manage the eSIM profile provisioning.

    Frequently Asked Questions (FAQ)

    Q1: Which Samsung Z Flip models support eSIM?

    All models in the Samsung Galaxy Z Flip series are designed to support eSIM:

    • Samsung Galaxy Z Flip
    • Samsung Galaxy Z Flip 5G
    • Samsung Galaxy Z Flip3 5G
    • Samsung Galaxy Z Flip4
    • Samsung Galaxy Z Flip5 However, compatibility can vary by region and carrier, so always confirm with your provider.

    Q2: What are the main benefits of using an eSIM on my Samsung Z Flip?

    • Dual SIM Functionality: Allows you to use two different numbers (one physical SIM + one eSIM) on the same device.
    • Easier Carrier Switching: You can switch between mobile plans or carriers without physically swapping SIM cards.
    • Convenience for Travelers: Easily add a local data plan when traveling abroad without needing to buy a local physical SIM or incur high roaming charges.
    • Space Saving: Eliminates the need for a physical SIM tray, potentially allowing for other internal components or a slightly more robust design.
    • Environmental Friendly: Reduces plastic waste from traditional SIM cards.

    Q3: Can I use both a physical SIM and an eSIM simultaneously on my Z Flip?

    Yes, the Samsung Galaxy Z Flip series supports Dual SIM Dual Standby (DSDS) functionality, meaning you can have one physical nano-SIM and one eSIM active at the same time. You can choose which SIM to use for calls, messages, and mobile data.

    Q4: What should I do if my eSIM activation fails?

    1. Check Internet Connection: Ensure you have a strong, stable Wi-Fi or mobile data connection.
    2. Verify QR/Activation Code: Double-check that the QR code is clear and untampered, or that the activation code is entered exactly.
    3. Restart Phone: Sometimes a simple restart can resolve minor glitches.
    4. Contact Carrier: The most effective step is to contact your mobile network carrier. They can verify if the eSIM profile is correctly provisioned on their end, provide a new QR/activation code, or troubleshoot the issue directly.

    Q5: Can I transfer an eSIM profile from my old Samsung phone to a new Z Flip?

    Yes, Samsung supports eSIM Instant Transfer (or similar features) which allows you to move your eSIM profile from one Samsung Galaxy device to another without contacting your carrier.

    • On your new Z Flip: Go to Settings > Connections > SIM card manager > Add mobile plan > Transfer SIM from another device.
    • On your old Samsung device: You’ll receive a pop-up to confirm the transfer. Follow the on-screen instructions, which usually involve a verification code.
    • Note: The new device must be unlocked from any carrier restrictions for the transfer to be successful.

    Q6: Does removing an eSIM from my phone cancel my mobile plan?

    No. Removing an eSIM profile from your Samsung Galaxy Z Flip only deletes it from the device. It does not automatically cancel your service contract with your mobile network provider. You must contact your carrier directly to terminate your mobile plan and avoid being charged for services you no longer use.

  • How to Control Lights with Google Home

    How to Control Lights with Google Home

    Smart home technology has made life easier, and one of the most popular features is the ability to control lights using voice commands. If you’re wondering how to control lights with Google Home, this guide will take you through the entire setup process, from choosing the right smart bulbs to integrating them with Google Assistant for seamless control.

    Why Control Lights with Google Home?

    Before we dive into the setup process, let’s explore why you might want to control your lights with Google Home:

    • Convenience: Turn lights on and off without getting up.
    • Automation: Schedule lights to turn on or off at specific times.
    • Energy Savings: Reduce electricity consumption by automating lighting based on your schedule.
    • Accessibility: Great for people with mobility issues, allowing them to control lights hands-free.
    • Security: Set lights to turn on when you’re away to deter intruders.

    Now, let’s go step by step on how to control lights with Google Home effortlessly.

    Step 1: Choose the Right Smart Lights

    To control your lights using Google Home, you need Google Assistant-compatible smart bulbs or smart plugs if you’re using traditional bulbs. Here are some popular options:

    Smart Bulbs (WiFi or Bluetooth-enabled)

    • Philips Hue
    • LIFX
    • TP-Link Kasa Smart Bulbs
    • Sengled Smart Bulbs
    • Nanoleaf Essentials

    Smart Plugs (For Regular Bulbs)

    • TP-Link Kasa Smart Plug
    • Amazon Smart Plug
    • Wemo Smart Plug
    • Gosund Smart Plug

    Step 2: Set Up Your Smart Bulbs or Smart Plugs

    For Smart Bulbs:

    1. Install the smart bulb in your lamp or light fixture.
    2. Download the corresponding app (e.g., Philips Hue, LIFX, Kasa) from the App Store or Google Play.
    3. Follow the app’s instructions to set up the bulb and connect it to your WiFi network.
    4. Test the light using the app to make sure it’s working correctly.

    For Smart Plugs:

    1. Plug the smart plug into an electrical outlet.
    2. Connect a traditional lamp or light fixture to the smart plug.
    3. Download the smart plug’s app and follow the instructions to connect it to WiFi.
    4. Test the smart plug by turning it on and off using the app.

    Step 3: Connect Your Smart Lights to Google Home

    1. Open the Google Home app on your smartphone.
    2. Tap ‘+ Add’ in the top-left corner.
    3. Select ‘Set up device’ and then choose ‘Works with Google’.
    4. In the search bar, type the brand of your smart bulb or plug (e.g., Philips Hue, LIFX, TP-Link Kasa).
    5. Tap on the brand, then sign in with your smart device account to link it with Google Home.
    6. Once linked, Google Home will detect your smart lights.
    7. Assign your lights to specific rooms for easier control.

    Step 4: Control Lights with Google Home Using Voice Commands

    After successfully setting up your smart lights, you can control them using simple voice commands with Google Assistant. Here are some useful commands:

    Basic Commands:

    • “Hey Google, turn on the lights.”
    • “Hey Google, turn off the bedroom lights.”
    • “Hey Google, dim the living room lights to 50%.”
    • “Hey Google, set the lights to warm white.”

    Color Control (For RGB Smart Bulbs):

    • “Hey Google, change the lights to blue.”
    • “Hey Google, make the lights warmer.”
    • “Hey Google, set the lights to daylight mode.”

    Scheduling and Automation:

    • “Hey Google, turn on the lights at 7 AM.”
    • “Hey Google, schedule the lights to turn off at 11 PM.”
    • “Hey Google, create a sunset routine.”

    Step 5: Automate Lighting with Google Home Routines

    Google Home allows you to automate your lighting by creating routines. Here’s how:

    1. Open the Google Home app.
    2. Tap ‘Routines’ under the settings menu.
    3. Select ‘New Routine’ and name it (e.g., ‘Good Morning’).
    4. Choose a trigger (e.g., saying “Good morning” or a specific time).
    5. Add an action by selecting ‘Adjust Lights’, then choose the lights and brightness level.
    6. Save the routine and test it.

    Troubleshooting: Common Issues & Fixes

    1. Smart Lights Not Responding

    • Ensure your smart light is connected to the same WiFi network as Google Home.
    • Restart your router and smart bulb.
    • Try unlinking and re-linking the smart device in the Google Home app.

    2. Google Assistant Doesn’t Recognize Light Commands

    • Check if your smart light is assigned to the correct room.
    • Rename the light in the Google Home app to avoid confusion.
    • Ensure your Google Home device’s microphone is working properly.

    3. Lights Not Turning On/Off with Routines

    • Verify that the correct lights are added to the routine.
    • Check your routine settings and triggers.
    • Try deleting and recreating the routine.

    Enhancing Your Smart Lighting Experience

    Now that you know how to control lights with Google Home, here are some additional tips to enhance your smart lighting experience:

    • Use Motion Sensors: Automate lights based on motion detection for hands-free control.
    • Set Up Away Mode: Schedule lights to turn on and off randomly to simulate presence when you’re away.
    • Integrate with Smart Hubs: Use hubs like Samsung SmartThings for advanced automation.
    • Voice Match for Personalization: Google Home can recognize different voices and customize lighting settings accordingly.

    Final Thoughts

    Learning how to control lights with Google Home can transform your home into a more convenient, energy-efficient, and smart space. With voice commands, automation, and routines, managing your home’s lighting has never been easier. If you encounter any issues, follow the troubleshooting steps to resolve them quickly.

  • How To Get Rid Of Double Chin?

    How To Get Rid Of Double Chin?

    How to get rid of a double chin?

    Everyone loves to look beautiful and flawless skin. When you see a kid with chubby cheeks, you find them cute and admire them. When you grow up and enter into your teens, you don’t find it cute anymore. Especially, fats around the jaws may look so embarrassing. They indicate accumulation of fat. When you see it in the beauty point of view, they are not so attractive. When you see it in the health point of view, they are not healthy sign.

    You don’t necessarily spend too much money on treating the double chin. You can still enhance your appearance in less or no expensive way. There are several natural home remedies and exercise to eliminate fat accumulated under the jaw, neck, and throat.

    Many people want to get rid of double chin due to health reason or for the sake of beauty. The reason could be anything, eliminating double chin will give you confidence. However, It is not very difficult to get rid of double chin. With proper diet, home remedies and exercise you can easily eliminate the excess fat under your chin. You have to remember one thing, you cannot come out of this issue in one or two days, it takes few weeks and even months. If you want a long-term result, keep trying the below methods.

    What is a Double Chin and who has this issue?

    A double chin is commonly called as submental fat or excess fat under the skin. When excess fat is settled under the chin, you can see a layer formed below your chin. Of course, double chin is associated with weight gain, but not everyone needs to be overweight to have a double chin. Even a slim person can face this issue.

    How to get rid of it?

    Some of the simple technique to eliminate double chin are massage and exercise.

     Massage

    A good massage can also do the magic to your double chin. You can massage the skin underneath your chin using oil. Apart from eliminating the excess fat, it can also improve the blood circulation to your chin and helps in getting rid of the excess fat accumulation. A massage can be done with several oil, some of the commonly used oils are Wheat germ oil and olive oil.

    Wheat germ oil

    What you have to do is, take a little oil and apply it to your chin and start massaging in an upward direction. A massage session can prolong for 10 minutes. Do this thrice a week for better result.

    Olive oil

    Take required amount of olive oil and slightly heat it. When the oil is warm apply it on your chin and start massaging gently on your jaw.  Then Leave it overnight or few hours. Rinse it off.

    Exercise

    Experts suggest few exercise which can effectively eliminate the double chin. Consider doing this exercise regularly to have a great look.

    Stick It Out

    This is a simple exercise that can be done in a sitting position.  Look forward and open your mouth widely. In a tongue out position count till five or more, then take your tongue inside your mouth and start counting again. Repeat this exercise few times a day

    Jaw Jut

    Slightly lean your head back and look at your ceiling. After this, bring your lower jaw forward until you  feel a stretch beneath your chin .Remain in this position for minimum of 10 minutes. Then, come to a relaxing position and bring your head to a neutral position. Repeat this exercise few times a day

    Neck Roll

    Come to a standing position and drop your chin forward in such a way that it should touch your chest. Later, slowly turn your head towards right. Hold on this position five counts. After that, you need to rotate your head towards back. You should continue to rotate your head towards left. Hold on this position for five counts. Repeat this exercise few times a day

    Tongue on Teeth

    Come to a erect position such that your straight is back. Then keep your mouth open as far as possible. Place your tongue edge against the backside of the bottom row teeth. Do inhale and exhale, while Inhaling use your mouth, and while exhaling make a sound. Keep doing this work out for few minute. Now relax your mouth and tongue. Repeat this exercise few times a day.

    Laying Lifts

    Lay on your bed and face upward, now let your head to hang off the end. After coming to this position, now slowly lift up your head to your chest. You should still keeping your back on bed and shoulders are flat against the surface. Hold in this position for few seconds. Then gently return your head as it was in its starting position. Repeat this exercise few times a day.

  • Dating Mistakes That Girls Make On a First Date.

    Dating Mistakes That Girls Make On a First Date.

    A dream date is every girl’s fantasy since adolescence. Yes there is always a checklist in mind of do’s and don’ts from both sides. Your first date is, ought to be hard, you will be nervous, with all the chemical reactions going in your mind. There are certain points to be kept in mind before you jump instantaneously from the first proposal of dating.

    • Keep your responses checked/crisp: Say suppose, he asks, “will you come on a date with me”? Yes, I will. When are you free or where shall we meet? You should reply, “You just text me the time and place” I will be there. Don’t just say yes and then leave everything on chance. Sometimes it’s better to buy time and let the guy chase. It increases the passion to achieve.
    • Restrain from your anxiety pangs: you are t be anxious, with thousands of doubts. But this is not the time to let that tidal wave spoil your castle of dreams. Meticulous planning will ensure better confidence level. Most important do not get anxious in front of him and speak out of context.
    • Be on time: After a lot of chasing and planning your guy would not want you to be super late for date. Being late by 10-15 minutes is fine but more than this i not good for the date in general. You also lose out time to spend together if you reach late.
    • Be the ice breaker: Any date would turn hollow, if the women don’t show any interest. You ought to ask, probe and answer to let the ball rolling. Long silences and running out of topics to converse is a bad sign for any date. Men like chatting up with women, who are intelligent.

    Chatting makes a lot of things easier and understandable.

    • Ex in conversation: While talking bringing your ex in talks is a real dampener. Absolutely no one wants to know about your ex in his/her first date. Avoid this topic on all costs. Bringing skeletons from the closet can have dire consequences.
    • Switch off the mobile: Checking your mobile often, shows lack of interest. Where is the time to be busy with gadgets and you can inform your family and friends to not call/text for some time?
    • Show your positives: No one wants to date a crib-pot, pessimist or fault finder. Show your best version, it will do you own well, raise self-esteem, positive date, well spent evening, looking forward to meeting again.
    • Stop being judgemental: a critical analysis of you, date, time spent, ambiance, music, food, drink, conversation, or just about anything is avoidable. Nothing comes with perfection, you are ought to make things perfect.

     Proceed towards your date with an open mind. No hang-ups, no over-expectations, no overdoing, no over drinking and no to almost everything which you think can be annoying. After meeting in 15 minutes, you know where the evening is heading to.